Monday, January 30, 2012

Building up Back Frame Assembly Parts

    Rail, ties, spikes and spiking tool were purchased from SwitchCrafters in Albany, Oregon to make a four foot test track to check operation of moving parts.  These include drivers and other wheels, equalization gear, springs, driver rods, etc.   In the photo above a six inch wide baseboard precut to four foot length was purchased along with two molding boards that have one beveled edge.  The beveled edges were on opposite side.  The rail shown here is temporarily layed out on the ties.  At this point all the wood and ties were glued down.
    In order to obtain accurate track spacing three track gauges were made using the 3D printer.  Each gauge has openings that provide access for the spiking tool.  Above the track gauges hold the rails in position.  The locomotive frame with drivers is shown in place on the rails.  The gauge for 1/24th scale is 2.354 inches (59.8 mm).  The gauges were accurate to a few thousandths of an inch and worked well in holding the rail in good position.
    Above is one of the track gauges in position on the rails.  Code 250 rail is used.  The gauges are sufficiently tight on the rails to hold them in position within a few thousandths.
    The work of spiking the rails was done on the floor as my workbench otherwise is a glass top desk.  The spikes are 3/8" inch and two at a time fit into the spiking tool.  A hammer is then used to drive the spikes using drive pins that are part of the spiking tool.
    A small tweezers was used to handle the spikes during loading into the tool.  The tool has holding magnets that keep them in accurate alignment during driving.
    The spiking tool works on one side of a rail at a time positioning two spikes during the driving process.  The tool is then reloaded and positioned on the other side of the rail and spikes inserted there.  The process is then repeated on the other rail of the same tie.  Due to the stiffness of the rail and the fact the rails will not be loaded spikes were placed about every 10th tie.  The assembly is quite solid.  After completion of the locomotive another rail section will be built and ballasted to make it look better for display.  The wood base will be thicker and stained and some form of name plate added to describe the model.
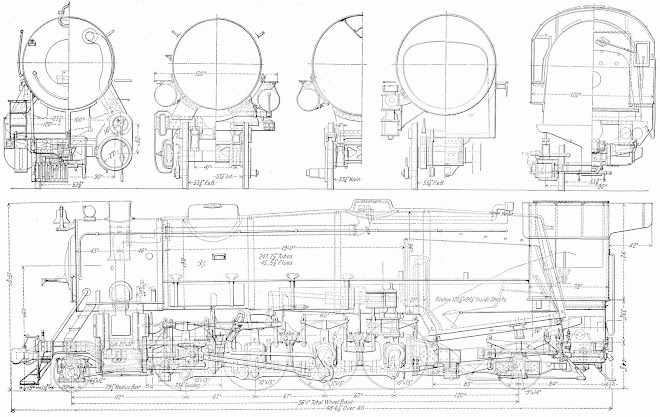
    Above is the model as currently completed on the finished testbed rail section.
    While working to build the test bed rail section the 3D printer was building various parts that will be assembled to make up the back frame section.  Above at left are parts still attached to raft and support materials while those at right have been built and removed for previous blogs.
    The above parts consist of a pair of equalizer mounts at left, two sets of equalizer bars at bottom center, four sets of equalizer pull rods that connect to the truck spring front, two sets of truck spring saddle front mounts at center right top and one set of truck spring saddles at right.  Still to be built will be two sets of truck spring leaves and spring clamps that will be similar to those built for the locomotive drivers.  All these parts look good prior to removal.  A couple of parts did not print correctly and had to be rotated to a different alignment to get good results.
    Above are some of the major component parts of the back frame.  At top is the frame side pair with an internal sacrificial support frame that was built all together.  After assembly of the front and rear spacer parts the sacrificial support frame will be removed by cutting it away at the attachment points at the inside of the frames.  The frame insides will then be trimmed and sanded to remove any material not needed.  The interior will be hidden after locomotive firebox insertion by the clinker chute that runs down between the frames.
    At left upper is the rear mount for the trailing truck springs.  The springs will be attached near the outer edge well outside the frames and truck wheels.  This mount spans and surrounds the frame sides inside, outside and top.  At left bottom is the front spacer which includes the trailing truck pivot mount at left of the part and the front firebox mount at right.
    The small round part at right upper with the two cones is the trailing truck centering device.  This part contains a spring that pushes the cones outward.  The trailing truck will have push rods that will be centered inside the cones and push the spring inwards.  When the truck is centered the cones will be held by the housing and keep in position.  If the truck moves either direction it pushes a cone inward and the spring provides a centering force to restore the truck back to center.
    The bottom right corner part is the back spacer for the side frames and includes the tender drawbar attachment pin and tensioner pad.  The drawbar pin will be a machine screw.  The tension pad will not be implemented fully in prototype manner which calls for a wedge to be inserted at the tender end of the drawbar to pull the tender tightly to the locomotive frame pad.
    The trailing truck design is essentially complete and it too will be built along with the rear firebox mount to enable a fit check of most parts together.  A pair of rear spacer extension cab mounts will also be printed and attached to the frame rear outboard of the frames.
    A number of pivot pins will be done using machine screws and fit checks done a various sub-assembly levels before gluing parts together.  The correct alignment and fit of the equalization bars, pull rods and springs will dictate the final position of the truck spring mounts.  They will be very close to prototype positions but will likely need tweaking a bit to get good fit and operation.
    Some preliminary detailed design work is being done on the front pilot truck.  Wheels, axle and bearings are completed.  The pilot truck has a pressure driven centering device integral to the frame which may or may not be implemented depending on how well the 3D printer can do the small parts needed.  Other small parts have come out fairly well so this looks promising.

Wednesday, January 25, 2012

Back Frame Component Parts

    The trailing truck spring rear mount failed to build correctly as described in the previous blog posting.  The mount was rotated to place the top vertical which also put most of the plates making up the part vertical as well.  The above photo shows the part at removal from the BFB-3000 3D printer still attached and embedded in the clear PLA support material.
    After removal of the support the part came out well with no separation of any of the plates by support material.  No design change was otherwise made.  
     The trailing truck spring rear mount is shown placed on the back frame section for fit check.  The part fits correctly on the frame in the approximate location where it will eventually be glued.
    Another part being worked this past period is the Hodges trailing truck centering device.  This part consists of a tube containing a coil spring with a cone protruding out each end.  The cones are held separated by the coil spring up against the outer flange of the tube.  The tube was made in two parts with the cones integrated inside, but not in contact.
     The parts above are the preliminary build to check the cone and tube dimensions and fit.  The cones could sometimes slip out the flange end and the joint between the tubes was too tight.
    The cones accept a rod coming from a bracket on each side of the trailing truck.  When the truck tries to swing off center the spring applies centering pressure to return the truck.   In the center the spring forces on both brackets are limited due to the cones reaching the flange end of the tube.
    A coil spring was designed and four copies made as shown above.  The spring is 0.08" wire thickness with a coil diameter of about 1/4" and length of 1".  
    It took considerable patience to remove the support material which virtually surrounded the spring wire including inside the spring.  The two springs shown removed work as springs and return to at rest length after being compressed fully.
    Another set of tubes was fabricated correcting the fit of the cones and tubes.
    The tubes fit together better and the spring fits inside and works correctly.  The details for the tube are incomplete with the mounting brackets missing.
    The details were added to the tube design.  The support structure is shown after removal from the printer.  The details required much more support material than was required for the basic tubes.
    After clean up the detailed centering device parts are shown above prior to assembly.
    The above photo shows the partially assembled centering device.
    the fully assembled centering device above will be attached at the bottom of the rear firebox mount between the brackets on the trailing truck frame.  Small bolts will be used to provide push rods into the cones.  You can see bolt details on the mounting brackets of the centering device tubes.

Sunday, January 22, 2012

Continued Builds of Back Frame Parts

    The first run of the back frame sides resulted in distortion particularly where the frames fit into the pockets of the main side frames.  Although the frames were filed down and smoothed somewhat, they were too loose in the pockets and would have made alignment more difficult.  Consequently a second run was made as will be shown later.
    One of the parts that go on the back frames is the rear truck spring mount.  The mount cantilevers the spring mount outward from the back frame so the springs will be located over the trailing truck journals.  Also the mount part attaches the rear of the spring saddle with a vertical pivot point.  The above photo shows the second attempt at build immediately after removal from the 3D printer.  The raft and support structure penetrated through the part in places that should not have the need for support material.  The part design may be at fault.
     The top part is the first attempt.  During the run the printer stopped building support structure half way through the build due to excess spool pressure of the PLA supply spool.  That material is tightly wound on the spool and retains a tight circular shape that exerts significant spring pressure on the printer feed mechanism.  It is suspected that the spool spring pressure may need to be relieved by unwinding and rewinding the spool to reduce the pressure.  The machine feed failed several times during this and subsequent runs.  The bottom is a second attempt.  This time the support material continued OK, however, it was located through the main vertical walls of the part.  This is probably a result of poor design of the part and will need further investigation.  Perhaps the wall thickness was too little.
    A second run of the long back frame sides was done using a sacrificial internal frame.  The internal frame resembles a staircase.  The internal frame members are held with small extensions at the ends to the side frames so that the internal framework can be cut away after the front and back spacers are glued in place.  This approach also holds the frames in good alignment for the gluing process.  The photo shows the discontinued support material that exemplified the difficulties with the printer feed of the clear PLA from a partially used spool.  
    Another part being developed is the trailing truck centering spring assembly.  This consists of a housing and two cone shaped ends plus an internal spring that presses the cone shaped parts outward.  The trailing truck will have two screws that connect to the center of the inside of the cones providing spring pressure to center the trailing truck.  This part will mount on the bottom of the rear firebox mount.  The part above is the second trial and is not quite correct yet.  The cones should not pass through the housings freely, but should provide a stop keeping the cones from coming out of the housing under spring pressure.
    After removal of the support material the rear frames with the sacrificial internal frame is shown above.  The rear and front spacers have been inserted temporarily to check fit.  The fit into the main frame pockets is much tighter and now appear correct.  Also, both spacers fit well.  The spacers will be glued in place then the internal framework removed.  After other parts are properly located and attached, the back frame assembly will be glued in place in the pockets.  The trailing truck will mount under this portion of the chassis framing and the firebox will be located above it.

Thursday, January 19, 2012

    A set of parts forming the trailing truck equalization linkage is shown above.  The trailing truck equalization consists of a cross bar at the end of the locomotive Back driver springs and two down links that will ultimately connect to the trailing truck equalization levers.
    Above is shown the location and arrangement of the trailing truck equalization crossbar and down links.  The back portion of the chassis will be attached in pockets located on the insides of the main chassis frames.
    The pilot-cylinder frame section (PCS) is shown above with the raft and supports still in place.  This section required 6hr and 48min to build.  The large flat portion at the bottom is the front platform under the smoke box door of the locomotive and over the pilot truck.
    A slight rounding of the bottom edge of the platform occurred due to the tendency of the ABS to disconnect from the support material when the length exceeds 100mm.  The outer edges lifted as the printing went forward and resulted in a swept back look for what will become the front edge of the platform.  This edge will connect to the front sill of the locomotive that will have the cow catcher and front coupler attached.  It may be feasible to adjust the sill design to work with the swept back edge.  If not, a new run will be needed to build the platform and front frames.
     The frame parts mate well with the main chassis frame sufficiently snug that the front platform is lined up well with the main frame.
    The gap between the platform and main chassis will eventually have the cylinder assembly attached.  The cylinder assembly is nearly as wide as the platform and fills the gap with the piston and valve cylinders.  The front ends of the Front driver springs have the cross bar and single down link that will eventually connect to the pilot truck equalization lever.  That lever will have a pivot point mounted on the bottom of the cylinder assembly in the center of the gap.
    The cylinder assembly fits between two features on the frames that keep the cylinder assembly in place.   The cylinder assembly may be bolted or glued in place depending on the need for access to the pilot truck equalization system.
    Due to a prediction of over 31 hr to make the back frame with the main cross pieces in place, the side frames were made separately.  They are 7.5" tall nearly at the extreme limit of capability of the BFB-3000 printer.  During the printing the beams would move a bit with the extrusion head due to friction causing irregular edges and widths near the top of the printed parts.  The overall run time was 4hr 55min.  Very little raft and support material is located only at the bottom region so each frame stands alone.  This allowed them to flex side to side mainly with the extrusion head forces.  If they are to built again, a sacrificial internal support frame will be included in the design to stiffen the frames and prevent much motion during printing.  The sacrificial frames would then be removed by cutting, grinding and sanding.
    The two main cross pieces of the back frame are the rear spacer-draw bar pin and tender tensioner shown at the bottom right of the photo and the trailing truck pivot spacer and boiler mount shown at top center.  Each of these took 5+ hrs to build and included a considerable amount of support material that needed removal.
    After removal of support material and clean up the four major pieces of the rear frame are shown above.  The pieces will be glued together with support jigging before the assembly is attached to the rear chassis pockets.

    The rear frame was temporarily held together with rubber bands and slipped into the chassis pockets to check for fit and alignment.  The back frame is a bit loose in the pockets probably due to filing to smooth the back frames which had been built with quite a bit of roughness due to flexing while being printed.   A portion of the ABS driver gauging tool was used to support the back frame for the photo.

    The front frame front edge curvature is noticeable in this view.  More than likely this part will need to be built in smaller parts and assembled to avoid this effect.
    The overall size of the locomotive frame is seen in the above photo against a ruler.  The 23" length is for the locomotive alone, the tender will be a separate assembly and will likely be about 12" or more in length
    The back frame assembly has a large void in the middle extending from near the front edge to about the right end of the green ABS tool used to support the assembly.  That region will eventually have the clinker chute that extends down from the firebox to doors used to empty clinkers and ash from the firebox on the prototype.  Several other parts will be located on the back frame.  These include the equalizer bar pivot mounts, trailing truck spring mount front mounts, trailing truck spring rear attachment frame, and rear firebox mount.  Also located attached to the frame underneath the rear firebox mount will be the trailing truck centering spring assembly.

Saturday, January 14, 2012

Chassis Assembly

    At the front of each of the Front Driver springs a small link connects to the pilot crossbar.  This transfers equalization force to and from the pilot truck to the driver springs.
    Two copies of the pilot crossbar are shown above on the raft and support prior to removal.  Definition was good.  The crossbar combines the forces from Front and Intermediate drivers on each side of the frame to a coupling link which in turn connects to the pilot truck equalization lever. 
    The crossbar equalization link connects to the center of the crossbar and couples to the pilot equalization lever which will be added later after the cylinder assembly is added.  The pilot equalization lever pivots at the center of the cylinder assembly.
    The pilot crossbar equalization link printed with good definition.  Several copies were made in case of problems with yield.  In this case all copies were usable.
    After drilling and tapping all the trapeze levers, intra-chassis levers and chassis, assembly was done using mainly 1-72 screws and a few 3-48 screws for the intra-chassis lever pivots.  Each spring uses 11 leaves.  Also the chassis pedestal binders and chassis were drilled and tapped for 2-56 screws to basically complete all the parts needed to assemble the middle sections of the chassis frame mounting the eight drivers.
    Each spring couples via slots to adjacent trapeze levers except for the rearmost and front-most springs.  Those ends couple to crossbars, one for the pilot truck and another for the trailing truck.  The trailing truck crossbar lever is not yet designed or installed in the above photo.  The trailing truck is coupled via equalization levers to the rear two sets of drivers, Back and Main.
     The front springs of the Front driver couple to the pilot truck crossbar lever.  The Front and Intermediate drivers form an equalization chain with the pilot truck via the crossbar lever.
    The pilot crossbar is installed above linking to the front of each of the Front driver springs and coupling down to a point where the pilot truck equalization lever will be located.
.
     The above photo shows a close-up of the pilot crossbar lever and links.  The two small links on the front of the Front driver springs are about 1/2" long and represent about the smallest part that can be made with the BFB-3000.  Yield of those parts was not good, only half of the six parts turned out good.
     The chassis has been assembled with the drivers above showing the location of the various suspension springs and other parts of the equalization system.  These small parts took considerable time to design and fabricate, many taking several attempts to build successfully.
    The chassis with drivers installed begins to look a bit more like a locomotive frame section.  The wheels turn freely and the spring and equalization system seems to work quite well.  The pilot and trailing truck portions of equalization are still to be built and attached.
The chassis center section above has many small moving parts and represents a significant amount of design and fabrication effort.
    Several more parts will need to be fabricated and added to the chassis for the crosshead links and boiler mounts.  Also, the side and other rods will be designed and fabricated to connect the drivers together.