Revised: 8/28/2012 Subject To Revisions
Design of Drive Rods - Cam Lock Attachment Method
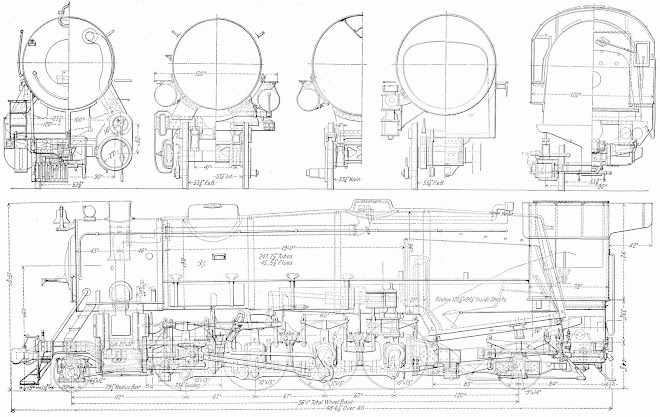
The author examined the sizes of the drive rods and learned that making them close to prototype configuration would provide very few threads to attach the front or rear drive rods (side rods) to the intermediate rod. Each side of the locomotive engine has a three articulated section side rod. The middle intermediate section connects from the main (third) driver to the intermediate (second) driver just ahead of it. Ahead of the intermediate rod the front drive rod connects from the intermediate rod extension to the front driver. Behind the intermediate rod the rear drive rod connects from a intermediate rod extension to the fourth driver.
Fireman Side Drive Rod Set
The front and rear rods pivot on the intermediate extensions allowing all four drivers to move up and down over track undulations while maintaining full traction force on the track. The equalization spring system also allows each driver as well as the pilot and trailing trucks to balance their respective traction or down force while moving along uneven track. The intermediate drive rod has to extended thin "I" sections with holes to accept a mating "Y" section with holes of the respective end rods. Ahead of the intermediate Although this is not a working model, the author wishes to make it as prototypical as possible fully testing the 3D printer's capabilities as possible.

Front Drive Rod Section
Because the arms of the "Y" on the front and rear drive rods are very thin (0.04458"), very few if any threads could be made on the inner arm that travels very close to the driver. No room for a separate nut. Even an 0-80 screw would have just 3.6 threads. In the ABS plastic this would be asking a great deal to either make the threads or have them survive several insertions and removals during the balance of design, build, fit checks, disassemble and assembly operations. Further, a fairly precision washer (~0.099" thick X ~0.213" OD X 0.066" ID) would be needed between the "Y" arms to prevent collapse or over tension on the inserted "I" section else the sections would not freely rotate as in the prototype. Standard washers don't fit the bill. Specials might be made on the Sherline lathe with much difficulty. Overall the screw and washer idea were not at all interesting.

"Y" Section End of Front or Rear Drive Rod
A cam lock mechanism was envisioned that would permit the parts to be joined and permit rotation motion as in the prototype while transferring the thrust between the intermediate rod and the two end rods. The cam consists of a truncated round section inside the "Y" section of the end rods that when turned at right angle to line up with the bottom opening in the intermediate "I" section will pass through putting the round cam inside the round opening.

Cam Lock Arrangement Showing Insertion Angle
The end rods are then rotated putting the round portion of the cam into loose contact with the matching round section of the intermediate "I" section. Thrust of the intermediate rod is then passed through the round sections between the rods. Each end rod can also rotate up and down allowing the respective driver to follow uneven track as necessary.

Front Drive Rod With Cam Fully Engaged

Front Drive Rod During Rotation Into Position

Front Drive Rod At Normal Position

Rear Drive Rod Before Engagement

Rear Drive Rod Cam Engaged Being Rotated Into Position

Drive Rod Assembly
Building the Drive Rods with the 3D Printer - First Trial
The first thought regarding orientation in the printer was to place a full set of driver rods upright so that the cams and "Y" walls would not require much support material. Support material and residue inside such narrow openings is difficult to remove.
Set of Rods in 3D Printer Prior To Removal
The rod set took 4hrs 9min to build. Most of the support material was below the rods.

Close Up View Of Rod Set In 3D Printer
Close up inspection in the printer revealed that the near end support material separated during the print perhaps leading to the distortion observed on the intermediate rod ends above.

Rod Set After Removal From Printer
After removal the other ends of the intermediate rods also shows distortion probably due to the rather short thin section. There was no support material separation on this end.

Rod Set Showing Distorted Ends On Intermediate Rods In Middle

Distorted Intermediate Rod Ends
The ends of the intermediate rods with the separated support material shows the greatest amount of distortion of the Cam-Locks. They look unusable at this point.

Front and Rear Rods "Y" Sections At Sides
As planned the "Y" ends of the front rods containing the Cam portion shows good definition. They look to be directly usable without need of any clean up.

Rear Rod Ends Have Good Definition of Arms and Cams
The rear rod "Y" ends also have good definition and are clear of support material as planned.

Complete Rod Set After Removal Of Support Material
Removal of support was mainly done by hand with a small amount of needle nose pliers and model knife application. The Cam-Locks on the middle intermediate rods are mostly unusable without further shaping. Some of the ends are so bad they cannot be adequately re-shaped.

View of Poorly Shaped Cam-Lock Ends on Intermediate Rod "I" End Sections
A couple of the intermediate rod ends can be re-shaped using model knife and Dremel sanding wheel.
This was done to do trial fits of the end rods. While doing the trial fit it was discovered that the "Y" sections were too tight. The design files were revised to loosen up the tolerances of "Y" sections relative to the intermediate rod "I" sections and the cam diameter relative to the cam-lock diameter.
Building Drive Rods - Second Trial
The intermediate rod build file was revised to orient them laying down and applied to the 3D printer.
Intermediate Rod Set Built Laying Down Upon Removal From 3D Printer
The results looked much better than the previous trial. Some loosening of the support is evident on the lower of the two rods in the photo, however, no discernible distortion of the rod is observed.

Sets of Rods Using The Previously Built End Rods and New Intermediate Rods
With the good definition of the newly built intermediate rod cam-lock ends a good fit check was made using the prior built end rods. The "Y" sections of the prior end rods needed loosening up which was done using a model knife. The intermediate rods needed to have support material residue removed using the Dremel sanding wheel. After those improvements the cams of the end rods would fit into the cam-locks of the intermediate rods OK. The cam assemblies worked as planned allowing free rotation in the normal position while transmitting side forces between the rods. A preliminary check of the hole sizes showed that they would need to be opened up a bit except for the main driver hole which fit fine.

Close Up Of The Cam Lock Arrangement Used To Join Drive Rods
Using the modified first trial end rods with the second trial intermediate rods works, however, the "Y" ends of the end rods are somewhat distorted, not round as they should be.

Set of Drive Rods For Trial 1
Since the second trial intermediate rods have very good shape definition the author decided to make new end rods laying down also to take advantage of the better definition. The author was willing to put in the extra effort to remove the support material and residue inside the "Y" section that would occur.

New Front End Rods Built Laying Down Along With The Fit Check Set Just Discussed
A set of front drive rods was built which exhibited the planned better shape definition. The design files were modified to enlarge the "Y" opening and reduce the cam size to provide a suitable fit with trial 2 intermediate rods.

Trial 2 Along Side Trial 1 Intermediate Rods
The improvement in shape definition is clearly evident in the above photo.

Trial 1 (Top Set) and Trial 2 Front Drive Rods
On the new front drive rod "Y" ends at right side of photo the residue of the support material can just be seen sticking out. All the residue needs to be removed to achieve the design size. This was done using a model knife with plenty of patience.

Rear Set of Trial 2 Rear Rods
A set of rear rods was also built laying down with adjusted "Y" and cam dimensions as was done with the front set.

Complete Set of Drive Rods For Trial 2
The front and rear sets of rods need to be removed from the support material as shown above. The most difficult is removal of the material passing through the "Y" sections at the top portion of the rods in the photo above. After support removal the residue was removed on the back using the Dremel sanding wheel and inside the "Y" section with a model knife.

The Complete Set of Side Rods For Trial 2
The completed rods were fit checked above and were found to work freely. The cams installed readily and coupled in-line force as in the prototype rods well. These should work out fine. The holes or pins on the drivers need to be adjusted for proper fit. Only the main drivers with the larger holes fit correctly.

Driver Set Showing The Cam-Lock Arrangements
In retrospect the cam locking scheme works fine but requires patience to remove the support residue from the end rod "Y" sections. This method of joining the rods works very well freely allowing rotation and providing solid coupling between rods when they are rotated up to 45 degrees either side of in-line.
Adjusting The Rod Hole Diameters and Threading The Driver Pins
The next activity is fitting the drive rod set to the drivers. As was stated previously the shafts on the wheels for the rods do not fit the holes in the drivers being a bit too large. Further, each shaft section except the on the main drivers needs to be threaded for retainer screws. In order to do the threading and driver modifications requires that the bulk of the locomotive be disassembled.

Partially Disassembled Locomotive.
Disassembly involved removing the front frame with pilot, pilot truck, driver springs and frame keepers beneath each driver. The photo above shows that in addition to removal, each driver set must be taken apart to support work on the driver in the drill press.

Drilling Driver Rod Shaft For 2-56 Tap - #50 Drill
Each of the front, intermediate and rear drivers needed tapping for 2-56 threads. One quarter inch 2-56 screws with #2 flat washers will be used to retain the rods on the short rod shafts.

Dremel Drill Press and Tool Used To Drill Driver Rod Shafts
The Dremel drill press and tool worked well with the small #50 drill called for to prepare for tapping 2-56 screw threads.

2-56 Hand Tap and Drivers
A hand tap holder was used to make the small threads. It works very easily without problems in the ABS plastic of the wheels.

Sherline Mill Used To Drill Rod Holes To Fit Drive Wheel Shafts
The author's Sherline Mill was used manually like a drill press to enlarge the holes in the rods slightly. This worked well in the plastic and did not require a holding fixture.

Author's Compliment of Power Drills Used For Project
The Sherline mill at left can be operated either manually or automatically as a CNC tool. The Dremel drill press and hand tool at right were used for the smaller drill size.

Fit Check of Drivers and Rods
The sets of drivers and rods were fit checked to verify free rotation and proper clearance.

Disassembled Locomotive Frame and Parts
The photo above shows the stage of disassembly of the locomotive. There are many, many parts in the model at this point. The author designed many for disassembly to support operations such as the activity just carried out.

View of Disassembled Locomotive Frame

Another View of Disassembled Frame

View of Fit Checked Driver Set Ready For Installation

View of Inverted Frame With Drivers and Frame Keepers Installed
The reassembly calls for the drivers and their respective frame keeps to be re-installed first.

Locomotive Frame Upright Ready For Rod Set Installation

Locomotive With Rod Sets Installed
Each rod set uses three screws and washers to retain it in place, one each in the Front, Intermediate and Rear driver. In the above photo black screws were used with stainless steel washers.

Another View of the Driver Rod Set in Place
The locomotive mechanism moves freely at this point allowing the individual drivers to move up and down as on the prototype. This was done to allow the locomotive to maintain traction on slightly uneven tracks as was usually the case for freight routes.

Fully Assembled Locomotive Motion Structure With Drive Rods

Closer View Of Assembled Locomotive With Drive Rods
The process of design, fabrication, adjustments, re-fabrication and final machining took the better part of several weeks working part time, even though retired. The next step will likely be the pilot truck equalization mechanism. This consists of a lever similar to those on the trailing truck and a pivot assembly. The pivot assembly is located between the frame members under the cylinder assembly. This will be done next to determine how it will be installed, removed or adjusted after the cylinders are attached.


